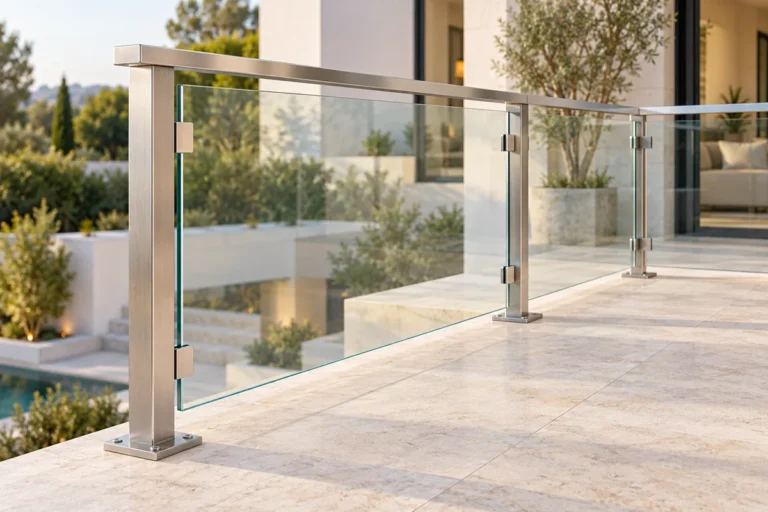
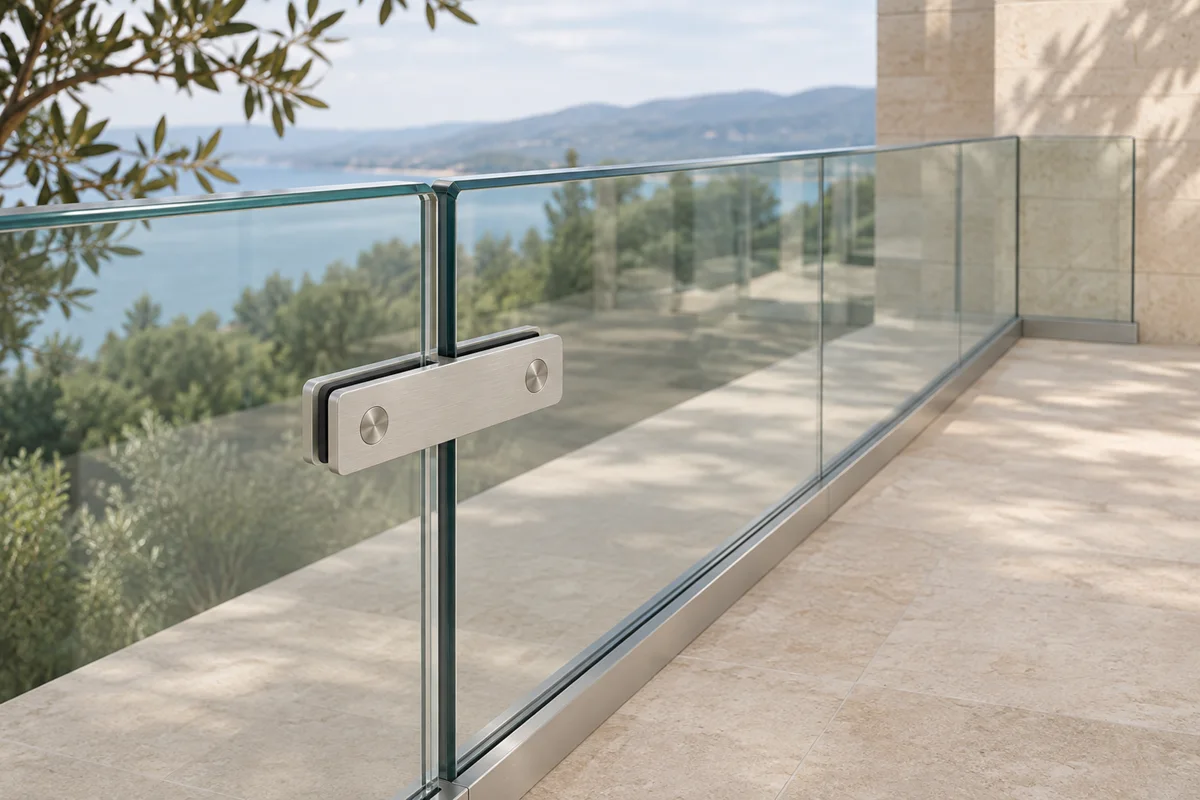
A glass to glass connector joins two glass panels without a post between them. It keeps the view open at corners and along long runs, which is why designers like it on balconies and stairs. However, the wrong connector, or the wrong glass, can turn a clean joint into a weak point. At UNIKIM we make these connectors in our Ningbo factory, so this guide explains how to choose one.
[Image: 90° glass corner on a balcony joined by two stainless connectors]
What a glass to glass connector does
A glass to glass connector is a stainless steel clamp with two jaws, one for each panel. Rubber inserts sit between the steel and the glass, so the steel never touches the glass edge. As a result, the two panels act together and share the load.
Connectors replace a post at the joint. That saves a post and gives a cleaner line. In practice, they work best with thick laminated glass and a continuous top rail, because the joint has no post to fall back on.
There are four main types: 180° in-line connectors, 90° corner connectors, adjustable connectors for odd angles, and wall-to-glass connectors at the ends.
180° glass to glass connector for straight runs
A 180° connector joins two panels in a straight line. It lets you build long runs from shorter, easier-to-handle panels.
We make two in-line models. MOD 2050 has a 106 × 45 mm body and holds 6–12 mm single or 6.76–12.76 mm laminated glass. Our 180° glass-to-glass connector MOD 2054 is made for 10 or 12 mm glass and joins two panels edge to edge.
Most straight joints use two connectors, one near the top and one near the bottom. Tall panels, or panels without a top rail, may need a third connector.
90° glass to glass connector for corners
Corners are where connectors save the most. Without a post, a glass corner looks almost invisible.
Our MOD 2051 corner clamp holds 6–12.76 mm glass and comes in brushed, polished, black, white or raw finishes. For balconies, our 90° glass-to-glass balcony railing clamp MOD 2055 has two 70 mm legs and holds 10 or 12 mm glass.
Corner joints carry load from both sides. For that reason, check the panel sizes and glass with the engineer before you fix the number of connectors.
| Model | Type | Size | Glass | Finishes |
|---|---|---|---|---|
| MOD 2050 | 180° in line | 106 × 45 mm | 6–12 / 6.76–12.76 mm | Brushed, polished, black, white |
| MOD 2054 | 180° in line | Edge to edge | 10 or 12 mm | Brushed or black |
| MOD 2051 | 90° corner | Corner body | 6–12 / 6.76–12.76 mm | Brushed, polished, black, white, raw |
| MOD 2055 | 90° corner | 2 × 70 mm legs | 10 or 12 mm | Brushed or black |
| MOD 2057 | Adjustable 90°–225° | 2 × 94 mm legs, 28 mm high | 10 or 12 mm | Brushed |
| MOD 2056 | 90° wall-to-glass | One screw fixing | 10 or 12 mm | Brushed or black |
Adjustable glass to glass connector for odd angles
Not every corner is 90°. Bay windows, curved balconies and stairs often meet at other angles. In those cases, an adjustable connector saves custom work.
Our adjustable glass-to-glass clamp MOD 2057 sets any angle from 90° to 225°. It has two 94 mm legs, a height of 28 mm, and holds 10 or 12 mm glass. You set the angle on site, then tighten the hinge.
Because the hinge is a moving joint, use two or more per joint and check the final angle before the glass is loaded. In addition, keep the hinge clean, so grit does not build up in it.
Wall-to-glass connector at the ends
A run of glass often ends at a wall. Instead of a post, a wall-to-glass connector fixes the panel edge to the wall, floor or ceiling.
Our 90° wall-to-glass connector MOD 2056 holds 10 or 12 mm glass and fixes with one screw. It suits wall ends, shower screens and glass partitions.
The wall must be strong enough to take the fixing. So check the substrate, and use an anchor that suits concrete, masonry or a timber stud.
Glass and code points for glass to glass connector joints
A joint without a post puts more weight on the glass and the connectors. That is why glass choice matters more here than with posts.
IBC Section 2407 on glass in handrails and guards requires laminated glass in most guards and a factor of safety of four. It also requires an attached top rail on guards with structural glass balusters, supported by at least three balusters. The exception is laminated glass with two or more equal plies, tested to ASTM E2353.
Loads come from IBC Section 1607.9 on loads for handrails and guards: 50 pounds per linear foot and a 200-pound concentrated load on guards. Therefore a glass to glass connector layout should always be checked by the project engineer.
Our article on glass railing load requirements explains these loads in more detail.
How many connectors per joint?
Two connectors per joint is the usual starting point, one near the top and one near the bottom. However, the right number depends on the glass height, the glass type, the top rail and the loads.
Tall panels often need three. Similarly, joints without a top rail need more care, because the glass carries the guard load directly. In those cases, the engineer may ask for thicker laminated glass rather than more connectors.
Keep the connectors at the same height on both sides of a corner. That way, the load path stays clear and the joint looks neat.
Glass to glass connector or posts and clamps?
Connectors and posts solve the same problem in different ways. A post with clamps carries the glass on a steel member, while a connector lets the glass carry itself across the joint.
Posts are easier to design and forgive small errors on site. They also give a natural place for a handrail bracket. By contrast, a glass to glass connector gives a cleaner view and fewer steel parts, but it asks more of the glass and the top rail.
In practice, many projects mix both. For example, a balcony may use posts at the wall ends and connectors at the corners. That way, the corners stay open while the ends stay simple to fix.
Worked example: an L-shaped balcony with an open corner
Here is a typical job, so you can see the logic. The balcony has two runs of 3 m and 2 m that meet at a 90° outside corner. In addition, the client wants no post at the corner. For the glass, the architect has chosen 12.76 mm laminated panels, a stainless top rail runs along both sides, and the site is near the sea. That mix of an open corner and salt air is common on coastal homes.
First, we choose the corner. MOD 2051 holds 6.76–12.76 mm laminated glass, so it fits this glass. Next, we plan two corner connectors, one near the top and one near the bottom of the corner panels.
Then we look at the ends. One end meets a wall, so a wall-to-glass connector or a wall post is needed there; the engineer chooses based on the wall. Finally, we specify 316 stainless steel because of the sea air, and we add spare rubber inserts.
The result is a clean, open corner with a continuous top rail. Because the rail ties the panels together, the corner keeps working even if one panel is damaged.
Materials and finishes
Most glass to glass connector models come in AISI 304 or 316 stainless steel. Use 304 for dry indoor areas and 316 for pools, coastal sites and heavy pollution.
Finish affects the look of the joint. Brushed steel hides marks, while polished steel matches mirror-polished posts. Black connectors suit dark frames and modern interiors. In addition, our rubber inserts come for each glass thickness, so order spares with the connectors.
Installation tips for glass to glass connector joints
Good joints start at the glass factory. Order the glass with the correct edge finish, and keep the joint gap consistent along the run.
On site, fit the rubber inserts first, then place the glass, then tighten the connector evenly. First, support the panels while you set the joint, because the connector does not carry the glass until it is tight. Next, check the top line of the glass before the final tightening. Finally, fit the top rail as soon as the panels are set.
For general clamp fitting, our guide to glass clamp systems covers the basics.
Common mistakes with glass to glass connectors
Most problems come from a few repeat errors. The first is using single tempered glass where the code asks for laminated glass. The second is leaving out the top rail on a run that has no posts.
Another mistake is mixing glass thicknesses at one joint. A connector made for 12 mm glass will not hold 10 mm glass safely, even with packing. Similarly, an adjustable connector set to the wrong angle puts stress on the glass edge.
Finally, many jobs forget spare rubber inserts. A damaged insert on site means the joint cannot be finished, so order spares with every glass to glass connector.
Cost: what changes the price
The type sets most of the cost. Adjustable connectors cost more than fixed 90° or 180° models, because the hinge takes more machining. In addition, 316 and black or polished finishes cost more than brushed 304.
Joint count matters too. A long straight run with in-line connectors needs fewer posts, which can lower the total cost even if each connector costs more than a clamp. So compare the whole system, not the unit price.
Why buy glass connectors from a manufacturer
A manufacturer can match the connector, the rubber inserts and the finish across the job. UNIKIM has over 20 years of manufacturing experience in Ningbo, China. We make glass to glass connector models, clamps, posts and handrails in 304 and 316 stainless steel, with OEM and wholesale supply.
You can see every model in our glass clamps and connectors category.
Trade buyers can also find the range on our store on Made-in-China.
FAQ
A glass to glass connector is a stainless steel clamp that joins two glass panels without a post. It has two jaws with rubber inserts, so the steel never touches the glass. Connectors come as 180° in-line, 90° corner, adjustable and wall-to-glass types, and they are common on balconies, stairs and glass partitions.
Most joints start with two connectors, one near the top and one near the bottom of the panel. Tall panels, heavy laminated glass or runs without a top rail may need three. The final glass to glass connector count should come from the engineer, because building codes set real loads for guards.
Yes, that is their purpose, but the glass and the top rail then carry more load. IBC Section 2407 requires laminated glass in most guards and an attached top rail on guards with structural glass balusters, with one tested exception. So a post-free glass to glass connector layout needs careful design.
It depends on the model. Some connectors hold 6–12 mm single glass or 6.76–12.76 mm laminated glass, while others are made only for 10 or 12 mm glass. Check the glass to glass connector data against your exact glass, and order the rubber inserts for that thickness.
Adjustable connectors are used on balconies, but the joint must be designed like any other guard. Our adjustable model sets angles from 90° to 225° and holds 10 or 12 mm glass. Use the right glass, enough connectors per joint and a top rail where the code asks for one, and have the glass to glass connector layout checked by an engineer.
Summary
A glass to glass connector removes the post at corners and straight joints, which gives a clean, open guard. Choose the type first: 180° for straight runs, 90° for corners, adjustable for odd angles and wall-to-glass for ends. Then match the glass thickness, plan two or more connectors per joint, and check laminated glass and top rail rules under IBC Section 2407.
UNIKIM makes every connector in this guide in 304 and 316 stainless steel, with matching rubber inserts and finishes. Send us your layout and glass, and we will confirm the models and return a quote. Contact UNIKIM for a quotation.